This article will guide you through the process of providing Move Portal product access to your end customers. It is divided into three parts: the first covers creating contracts, the second addresses editing existing contracts and setting up usage limits, and the third discusses assigning users to your contracts, whether they are existing or completely new accounts.
The Move Portal "contracts" feature allows you to create users and manage their access more conveniently and quickly by setting global rules for each contract and then assigning new users to them. With "contracts", you can:
- Assign consumption limits that multiple users will share
- Set product access in advance (schedule it for the future)
- Manage expiration dates with a single action for multiple users on the same contract
- Provide additional information and context through contract names or notes
To create a new contract, simply click the "New contract" button in the upper left corner of the "Contracts" list, then select the products it should relate to and provide all the necessary information.


Product icons - here you can select the products a specific contract should provide to all the users who will be assigned to it.
Contract ID - here you can type the number to identify this contract. This field is not mandatory.
Name / Legal number - here you can name your contract, so it will be later visible in our "contracts" list. You can, for example, name it after the company or the project, so it will be much easier to identify while browsing through all your contracts. This field is not mandatory, but in case it's empty, the contract will be visible as an "unnamed contract".
Start and End date - here you can specify when the access to the selected products should start and end for the users included in it. You can select the start date as the current day, meaning that the access will be provided instantly, or you can select any day in the future when the access should start.
Contract type - here you can decide which type of access you want to provide to all the users included in the contract. The Evaluation contract will provide evaluation access to test the Move products, while the License is based on full, paid access according to the agreements with customers.
Organization - here you can specify the organization this contract should be connected with. It's possible to either select an existing organization or create a new one by typing its name in this field.
Notes - an additional field to add more information about the contract, any remarks or important comments, to make the contract easier to identify.
Once all the required details are provided, click "Create" to add the contract.

At this point, you can decide if you want to create another contract, assign users to the newly created one, or just view the contract you just added.

If you need to make adjustments to the contract, such as changing its name, product access dates, or any other information entered during its creation, press the pencil button next to the contract name.

Keep in mind, however, that it is not possible to change certain values if there are users already assigned to the contract.

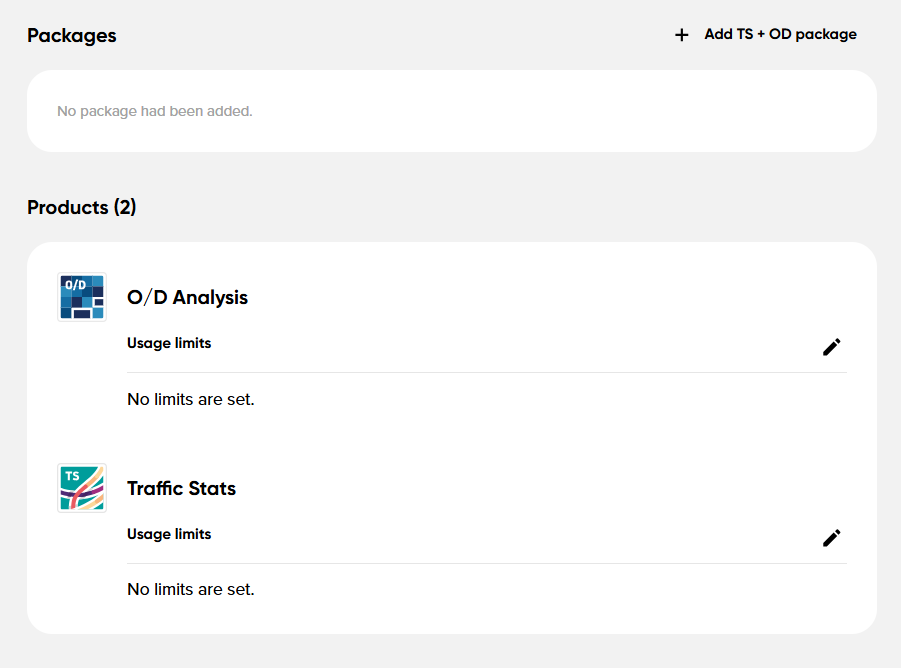
After creating a new contract, no limits are set, or there may be some default limits in place. You can either change them by setting a package limit (between Traffic Stats and O/D Analysis only) or by using the pencil button next to each product.

1. Route Monitoring
When setting up the limits for Route Monitoring application usage, you can specify the following values:
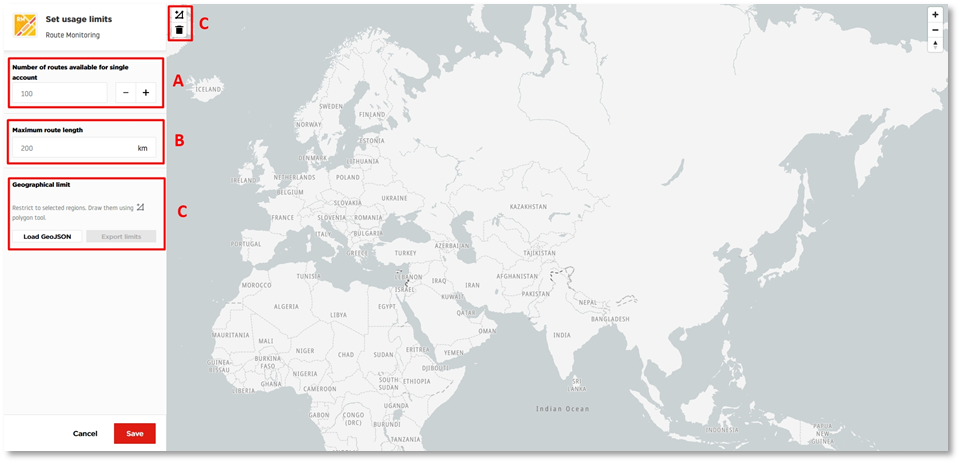
A) Number of routes available for single account (the total number of routes a user can create on the account)
B) Maximum route length (how long, in kilometers, can a single route be)
C) Geographical limit: load the GeoJSON with the defined limitations or draw a specific region where the user will be able to analyze the road network data. The geographical limit can also be exported if you want to apply the same limit to multiple applications.

2. Junction Analytics

When setting up the limits for Junction Analytics application usage, you can specify the following values:
A) Number of routes available for single account (the total number of routes a user can create on the account)
B) Geographical limit: load the GeoJSON with the defined limitations or draw a specific region where the user will be able to analyze the road network data. The geographical limit can also be exported if you want to apply the same limit to multiple applications.
3. O/D Analysis
When setting up the limits for O/D Analysis application usage, you can specify the following values:
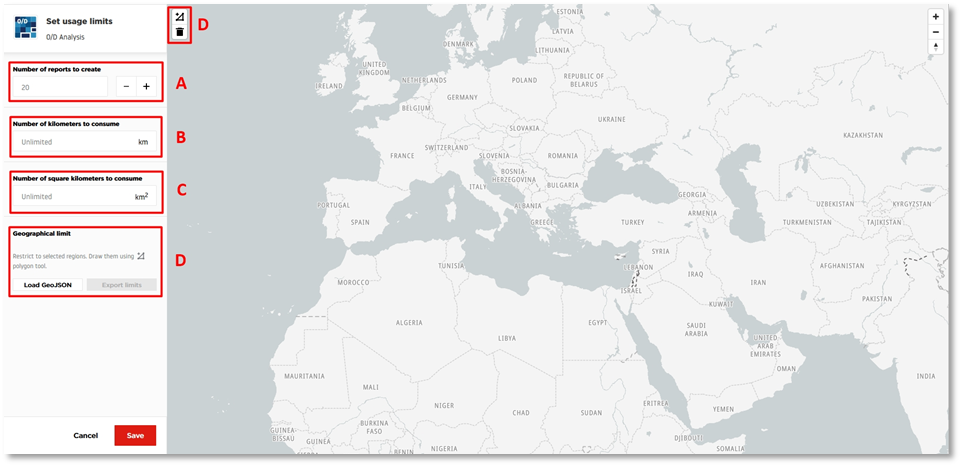
A) Number of reports to create (the number of separate analyses per account)
B) Number of kilometers to consume (the number of kilometers in Road Network Coverage which will be used for pricing purposes)
C) Number of square kilometers to consume (total area size in kilometers squared that user will be able to analyze in all O/D Analysis reports)
D) Geographical limit: load the GeoJSON with the defined limitations or draw a specific region where the user will be able to analyze the road network data. The geographical limit can also be exported if you want to apply the same limit to multiple applications.
4. Traffic Stats
When setting up the limits for Traffic Stats application usage, you can specify the following values:
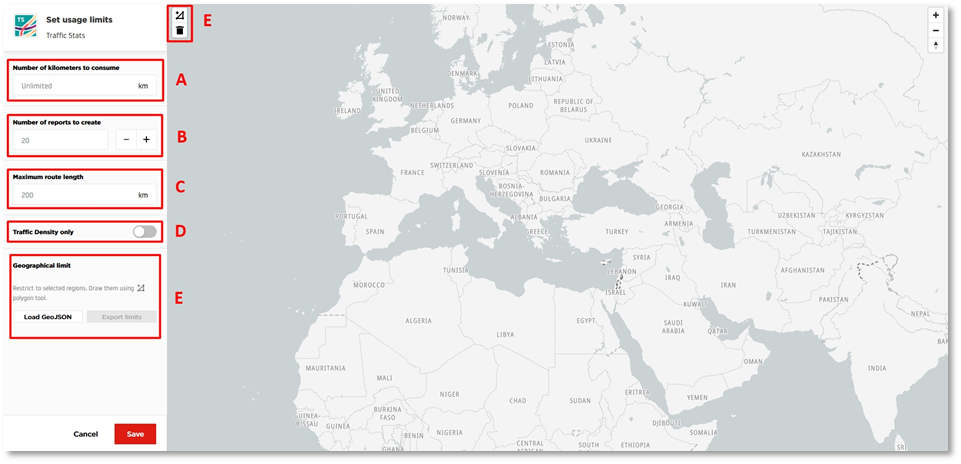
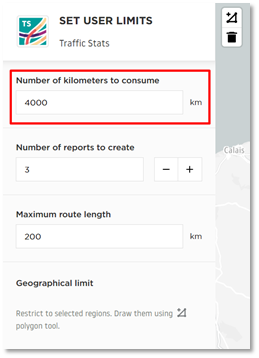
A) Number of kilometers to consume (total value of road network length kilometers the user will be able to analyze in reports). Keep in mind that segments with no data will not be counted as consumed limit.
B) Number of reports to create (the number of separate analyses per account)
C) Maximum route length (how long, in kilometers, can a route be in the analysis)
D) Traffic Density only (restricts the customer to create Traffic Density reports only)
E) Geographical limit: load the GeoJSON with the defined limitations or draw a specific region where the user will be able to analyze the road network data. The geographical limit can also be exported if you want to apply the same limit to multiple applications.
In case you are not sure what the specific limit value means, you can use the tips that are visible in the user account settings. A popup message with a brief explanation will appear once you hover your pointer over them, for example:

Example Limits:
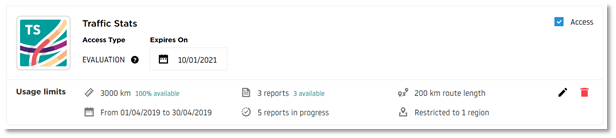
Let’s assume that you are providing access to a 4000 road network length kilometers package for Traffic Stats only. All you need to do is to set the Number of kilometers to consume value to 4000.
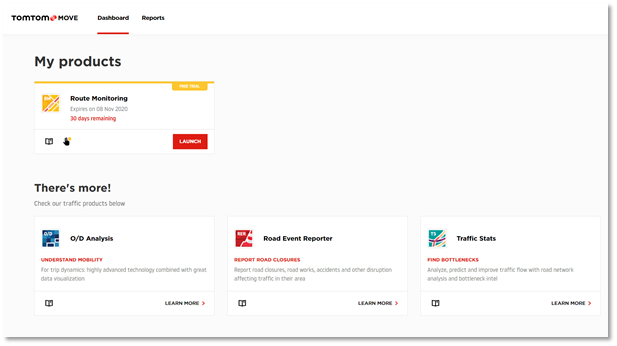
Below you can see how these limits are displayed on the user end:
Traffic Stats + OD Analysis package
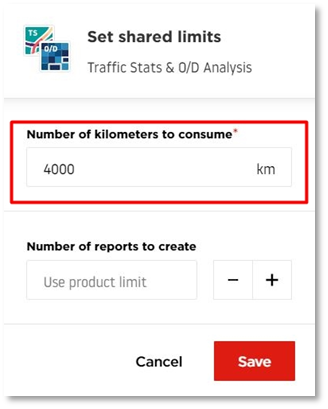
In case of a bundle sell, where you want to grant access to, for example, 4000 kilometers combined you will need to select "Add TS + OD package" which is available only for contracts with O/D Analysis and Traffic Stats access and located above the contract products section:
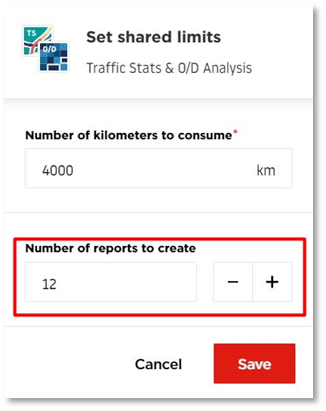
The additional window will appear, where you will be able to provide the number of kilometers to consume:
What's more, you can add a number of reports to create if applicable:
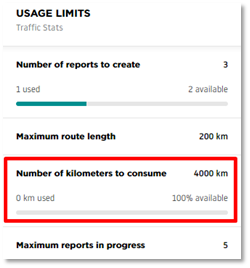
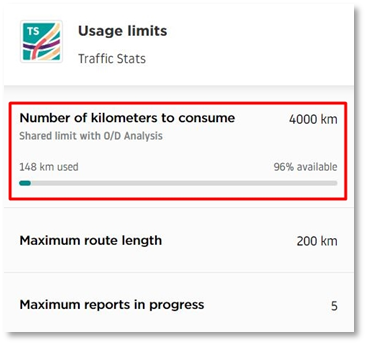
Below you can see how these limits are displayed on the user end from the Dashboard:
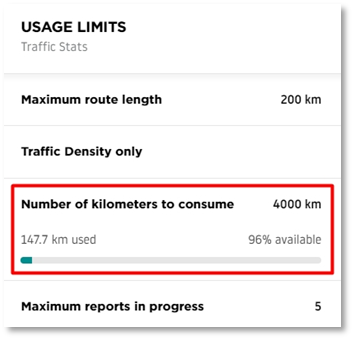
The limits can also be viewed directly in the application:
After making sure the usage limits are set properly, you can start assigning/adding users to your contract. To do that, click "Manage users" in the contract view.

At this point, a window to assign users will open. You can either select an existing user on the list and add it to this specific contract or create an entirely new user.
Keep in mind that it is not possible to assign users who are already connected to other contracts that are conflicting, for example, if both contracts provide access to overlapping date ranges.
It is only possible to assign users to multiple contracts if the values specified in them are not conflicting.

To create a new user, simply enter the e-mail address and click "Add new user".

It will then appear above the list of existing users. To finish the process, select this user and click "Save".

The portal will tell you if the process was successful by a popup message in the upper right corner.

You can now click on the user's e-mail address to see a summary of that account - the current account status, the access status, the products this user has access to, and the usage limits which are defined in the contract.

The newly created user will receive two emails:
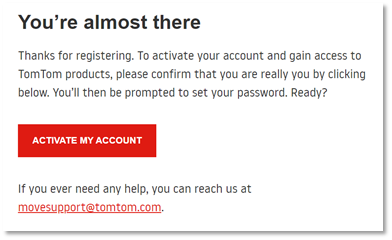
1) The first email contains the activation link to verify the email address and the account. The user can set up their password by clicking “Activate My Account”.
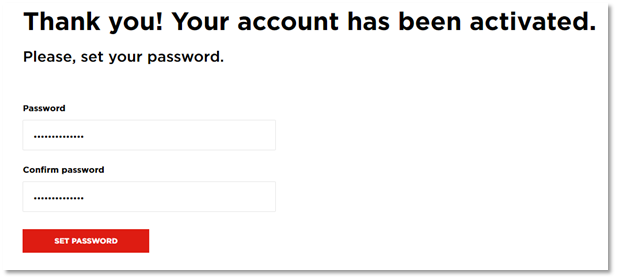
Below, you can see screenshots of the password-setting process. The user needs to provide a unique password, repeat it, and then click “Set Password”.
Once the password is set up correctly, the following message will appear:
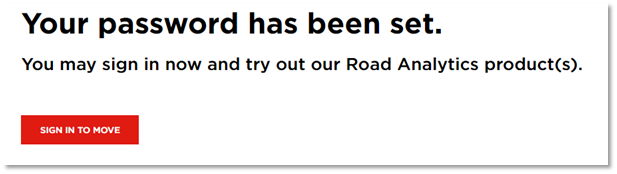
From this point, the user can sign in to the Move portal using the credentials provided during the password-setting process and the email address.
2) The second email contains information that access to the selected application(s) has been successfully granted.
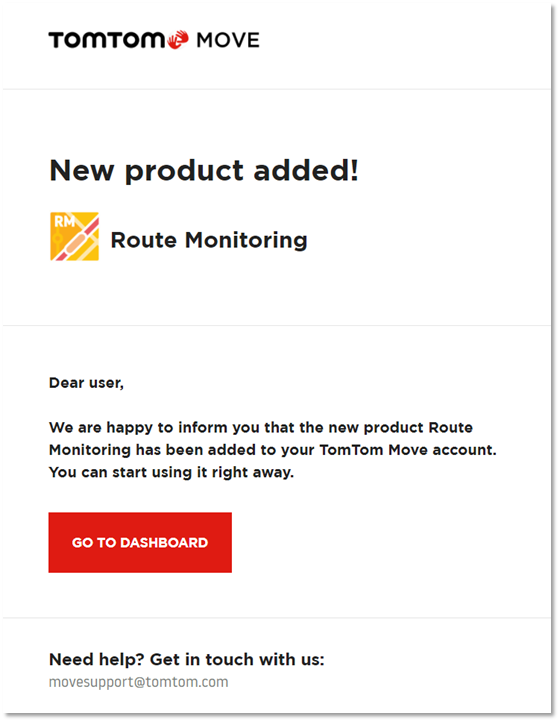
At the same time, the distributor will also be informed via email that access to the selected application has been granted to the user.

If the user confirms the account with the new password and product access is granted, they can use the Move portal. Based on the example scenario above, the outcome for the end user would look like this:
If you encounter any difficulties during the contract or account creation processes, please do not hesitate to contact us at MoveSupport@tomtom.com.