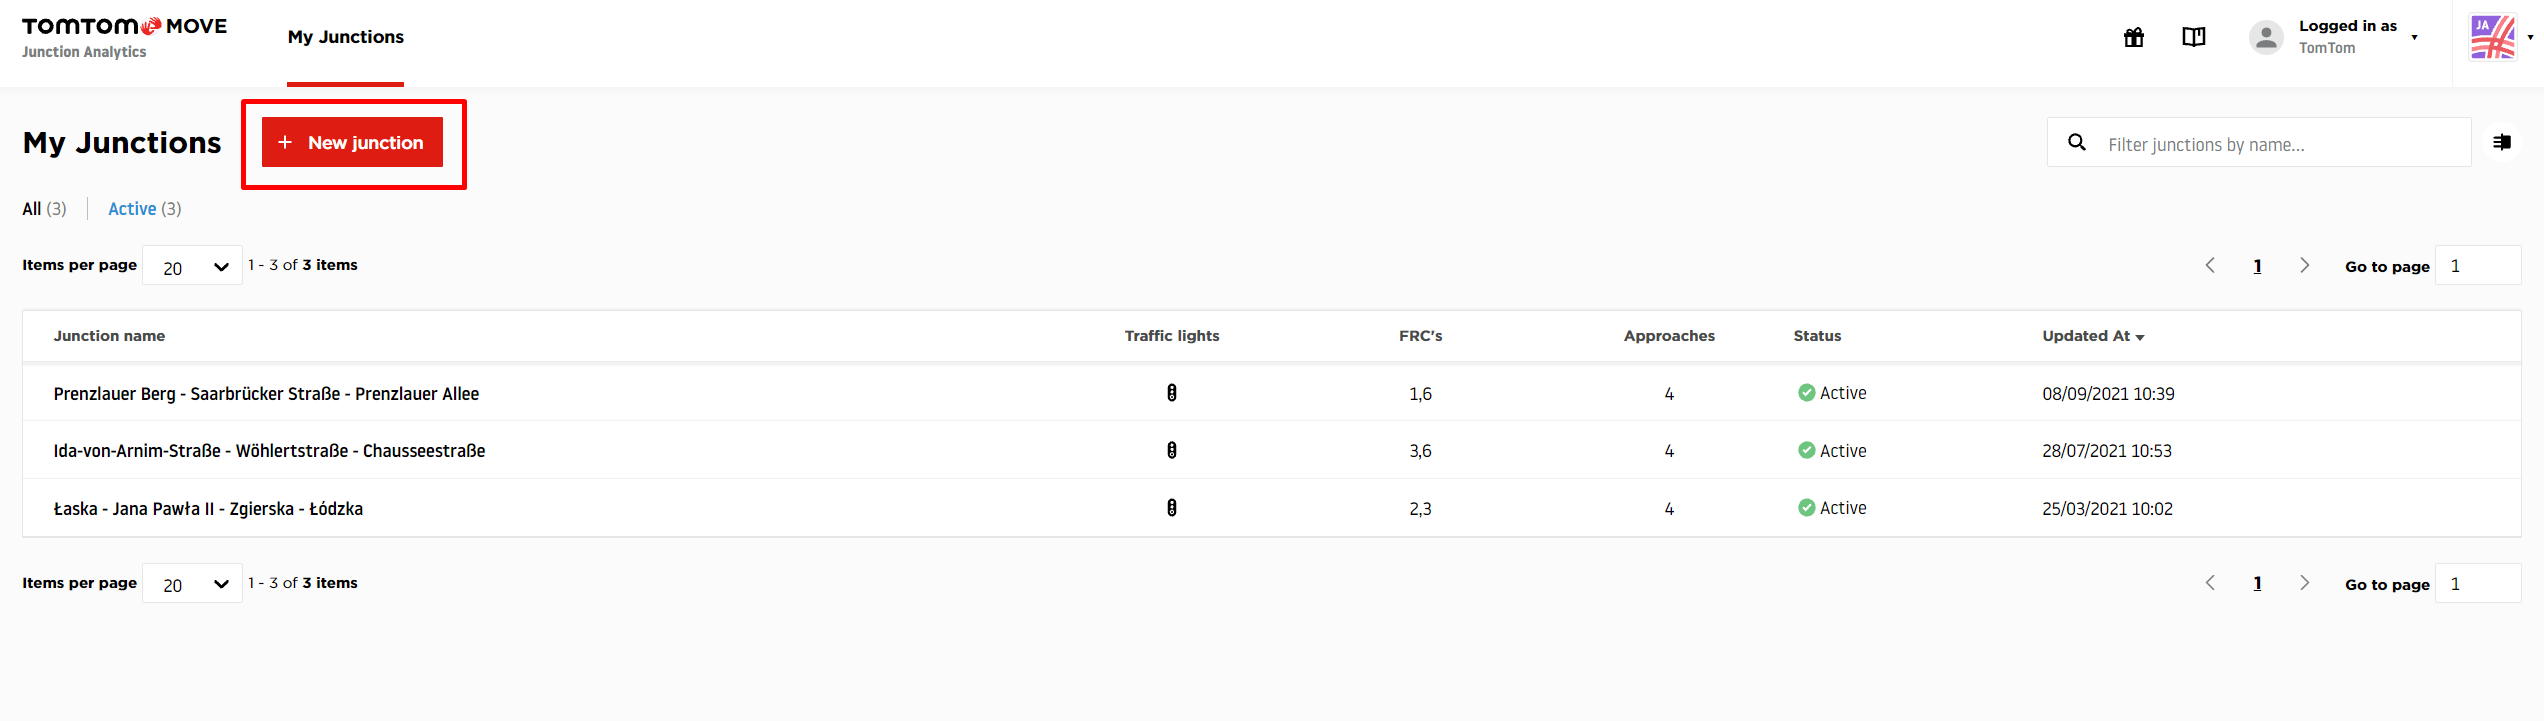
Follow the steps below to add a new junction:
1. Click “New junction”.
2. Search for the location you would like to analyze.
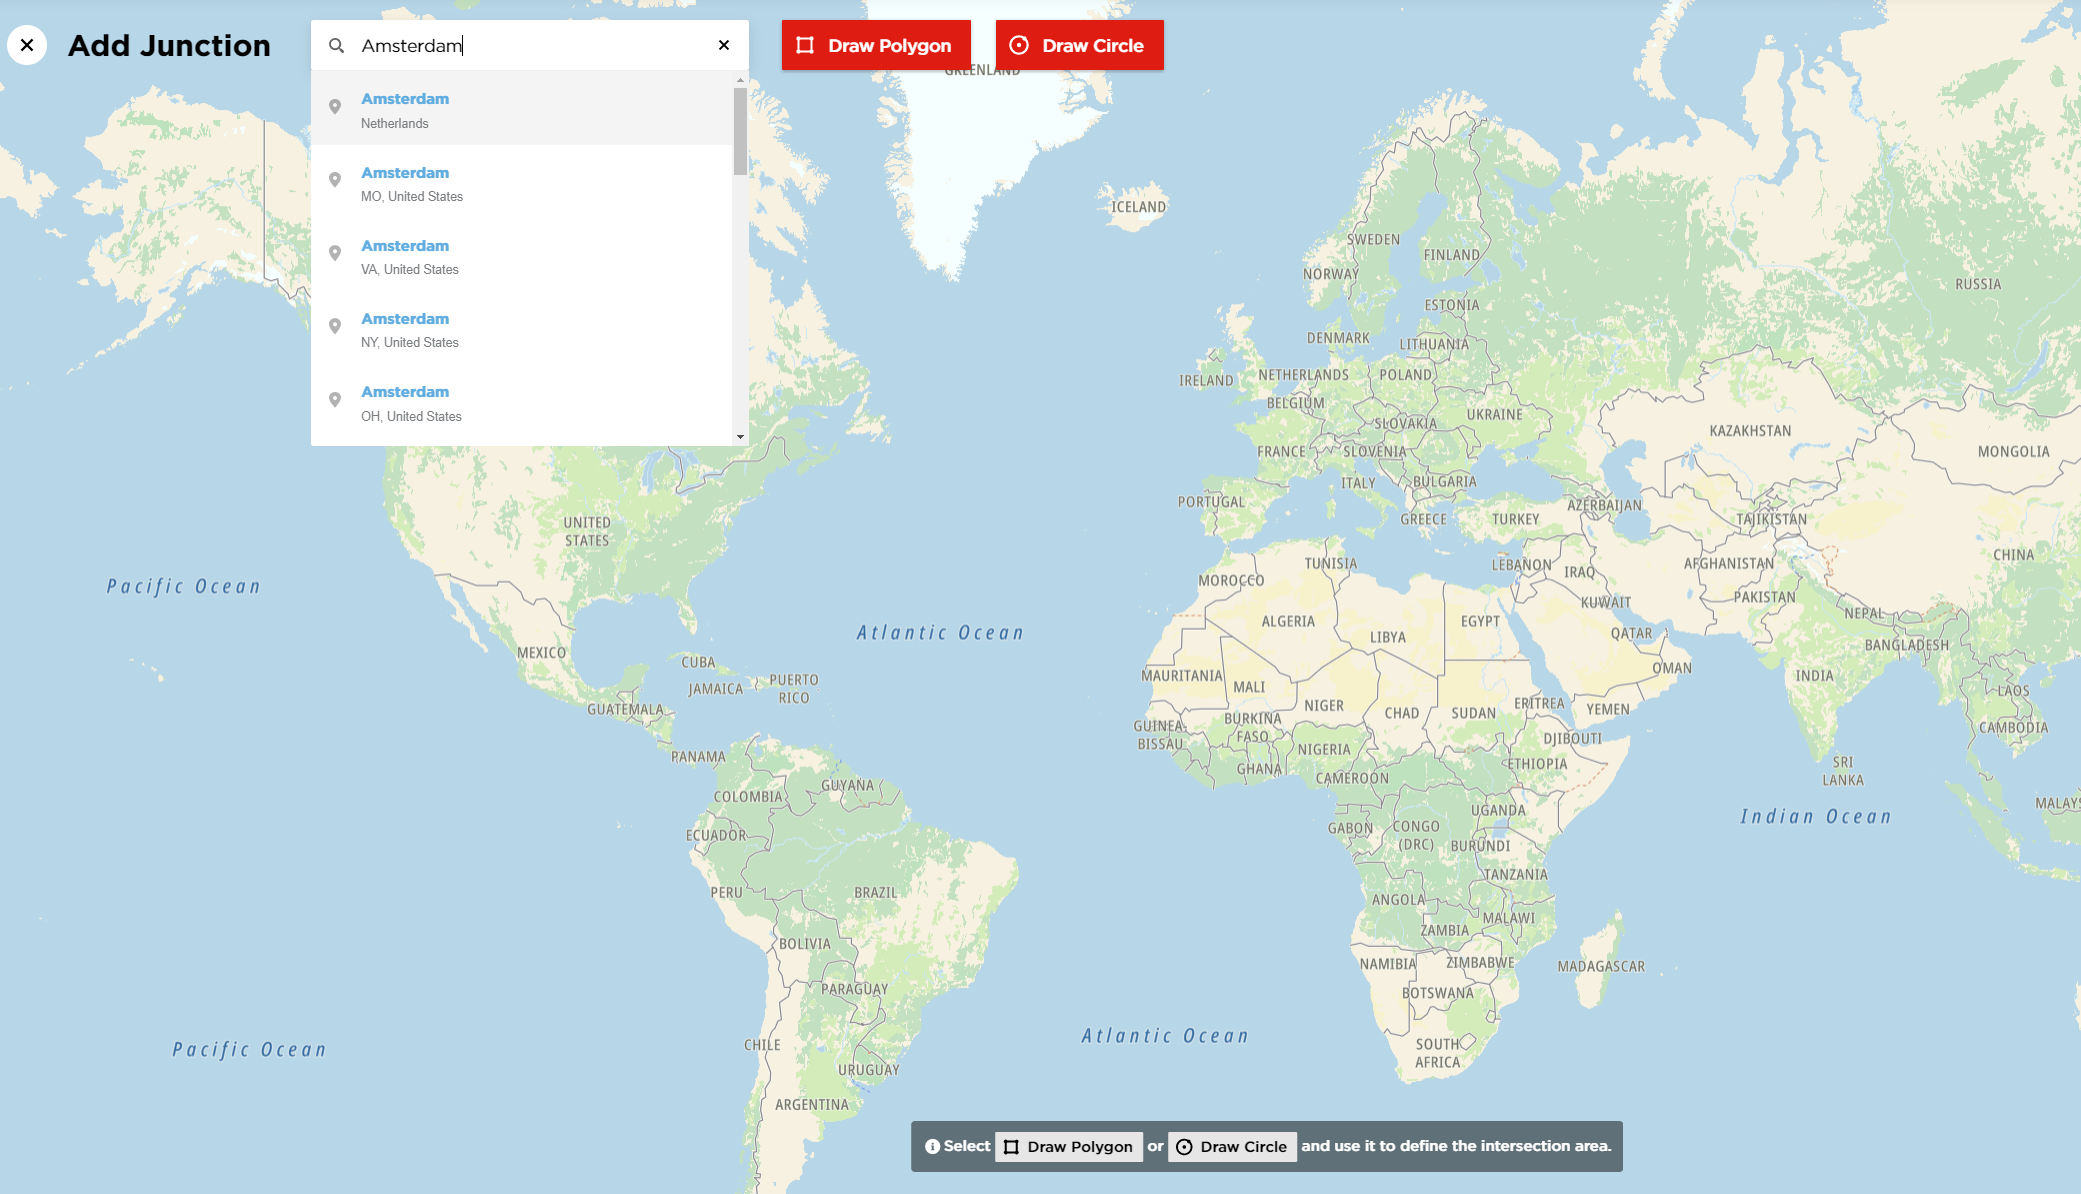
3. Select the drawing tool and define the junction boundaries.
There are two drawing tools available which you can use to add the junction: Draw polygon or Draw circle.
Draw polygon tool allows you to define a more complex boundary of the junction.
To add a polygon, add the points on the map by clicking and once you define the whole area, right-click to finish the drawing.
Using polygons is recommended for bigger, more complex junctions where you need to be more precise to include the roads you are interested in by defining custom shapes of the junction boundary.

Draw circle tool allows you to draw a circle by clicking in the middle of the intersection and then dragging it in any direction to increase the area size.
This tool is recommended for smaller, simple junctions where you can quickly specify the area where you do not need to stretch it in any specific direction to include all the roads you are interested in.
Keep in mind that your other junction boundaries will be visible while creating your new junction.
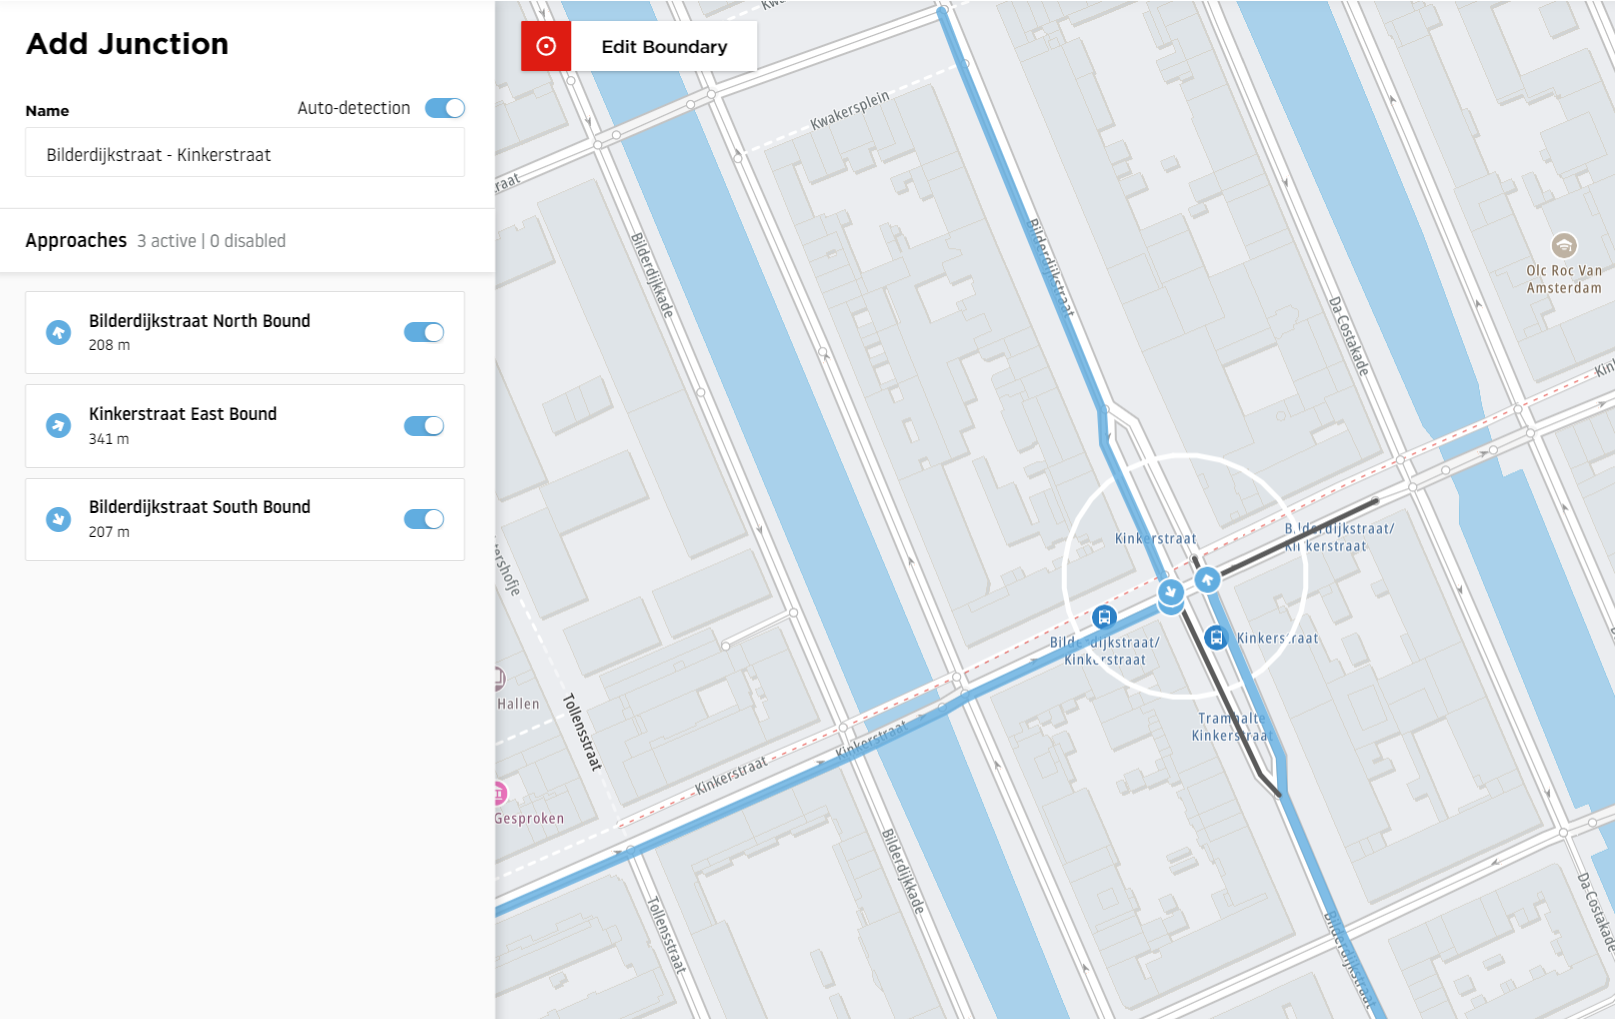
The name of the junction is provided automatically based on the names of the selected roads. To change it, you can disable the Auto-detection.

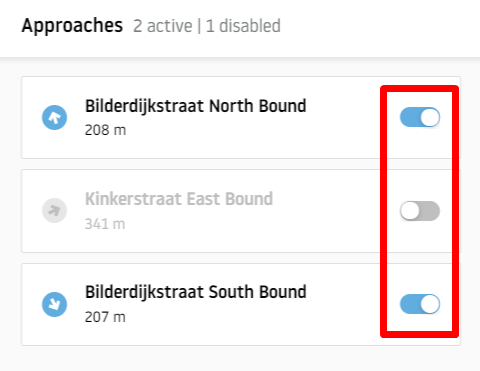
It is also possible to deselect the Approaches that are currently not needed.
Junction Boundary
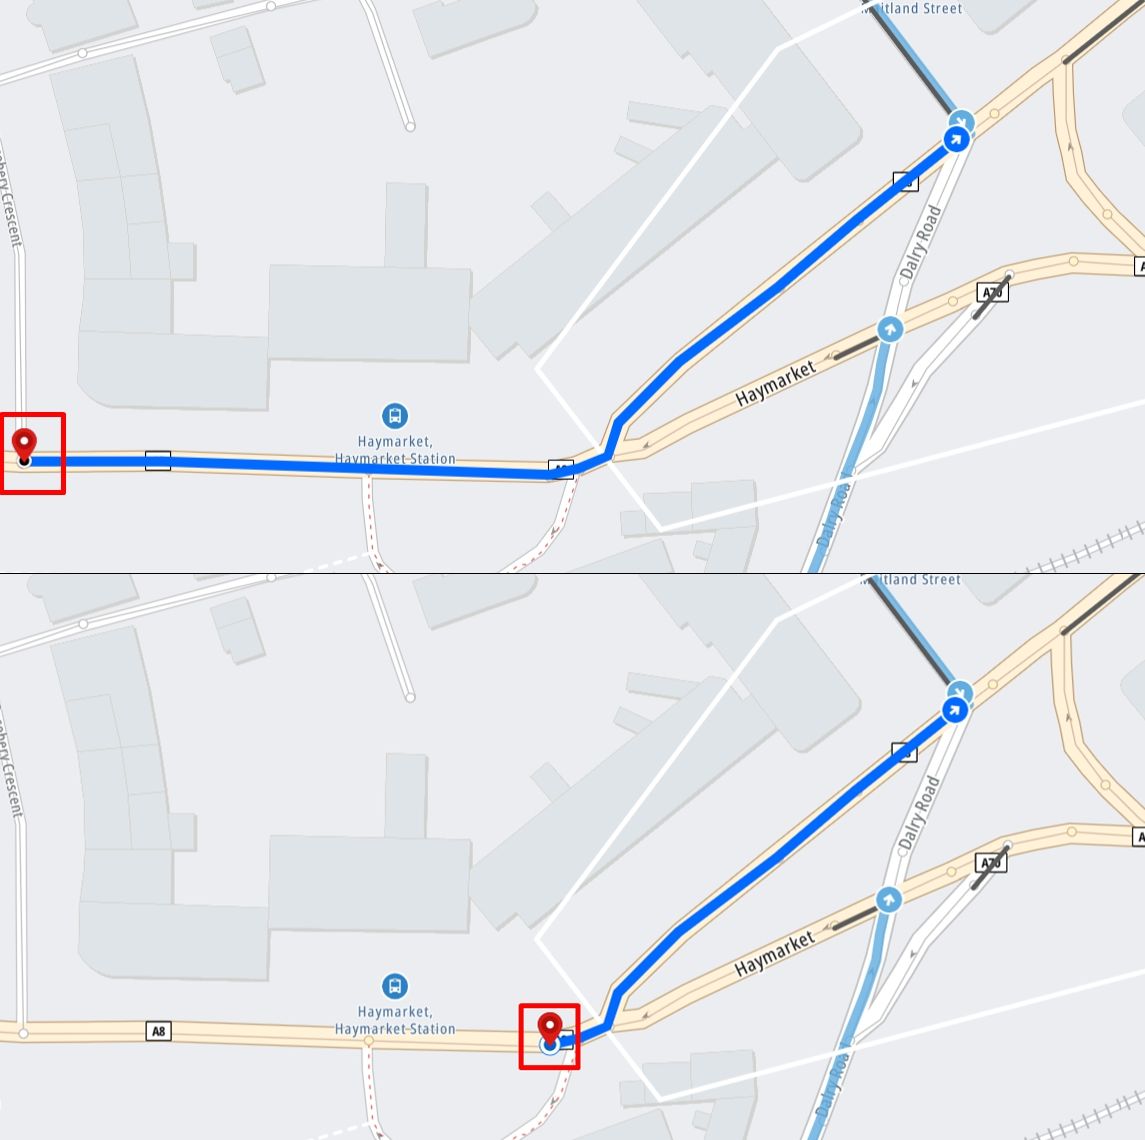
The most important thing to keep in mind while defining areas in Junction Analytics is the junction boundary. It is the external line of the defined area that is used to choose which junction approaches are taken into consideration by the tool.

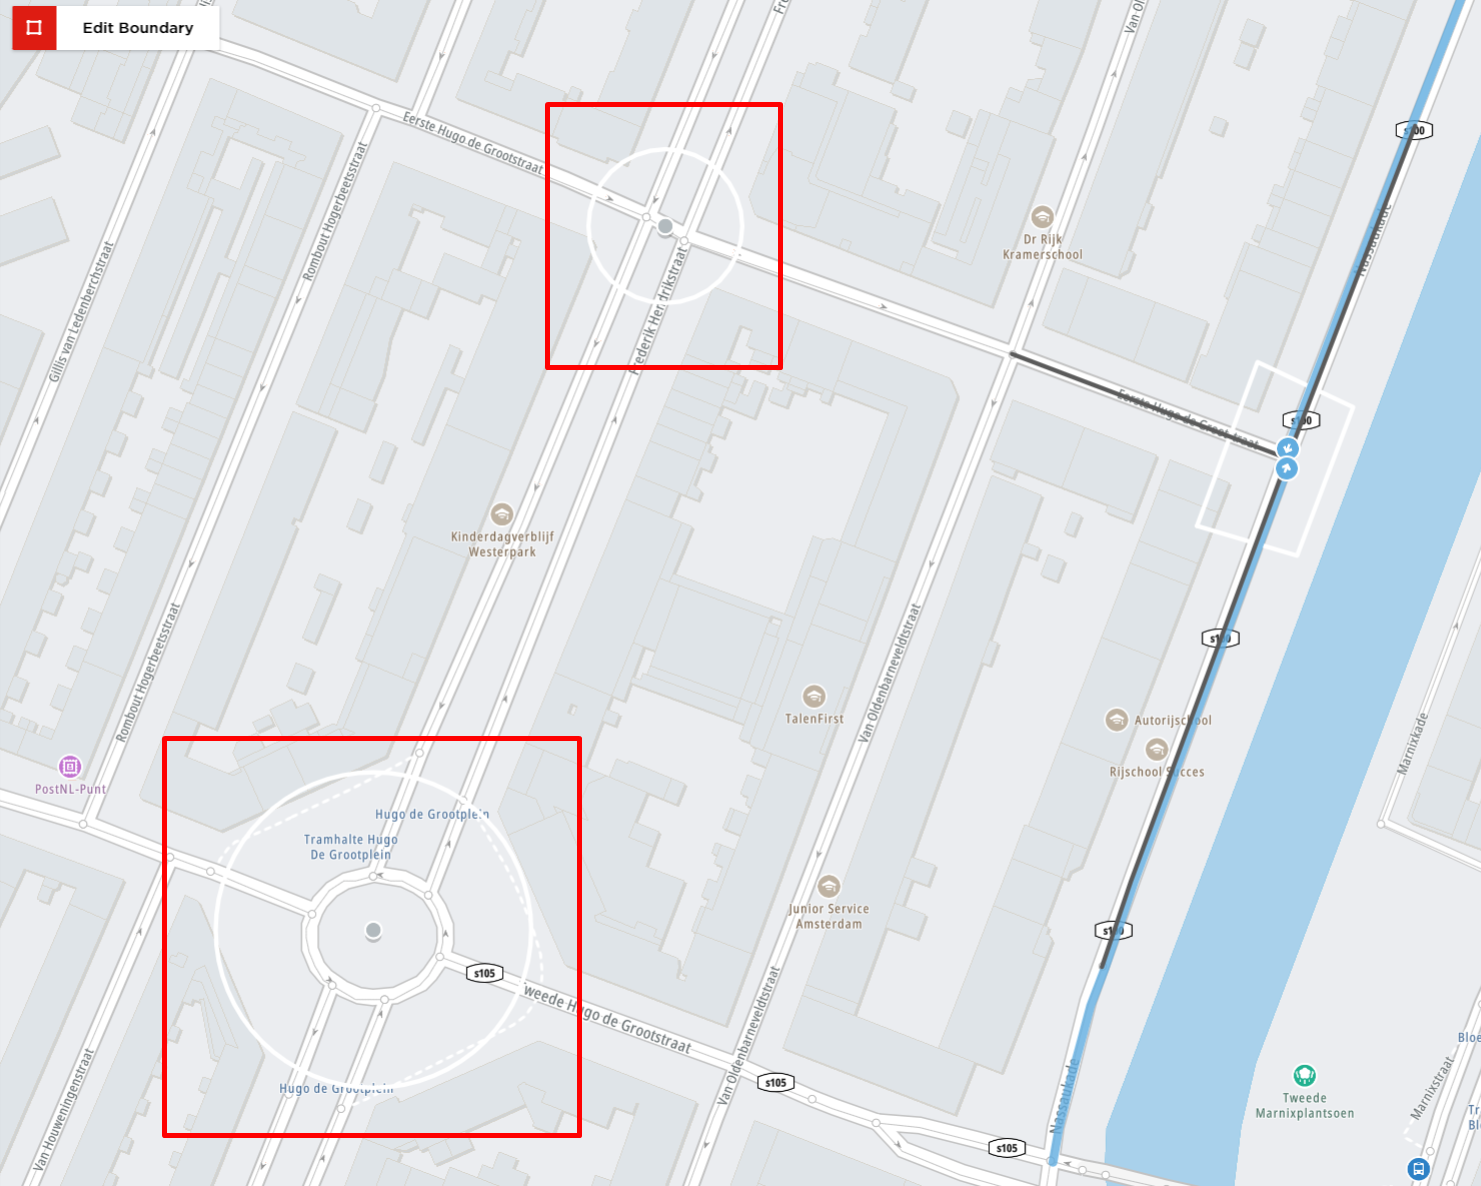
The area inside the defined boundary does not matter as much as the boundary itself. We do not consider the roads that are located inside the circle or the polygon, but the roads that are crossing the area boundary line. To understand it better, take a look at the example below:


You can see that while making the junction boundary bigger, you are not including all the roads inside the circle, because these roads are not crossing the boundary line.
The tool will only analyze the approaches that crossed the line of the defined circle instead and the original intersection we wanted to analyze will be out of the calculations.
Because of that, we always recommend drawing the boundaries near the intersection you want to analyze.
Manual Mode
In Junction Analytics, we also provide an option to manually edit the approach geometry. To do that, you can either click on the approach on the map or select it from the left side list and use the "pen" button.
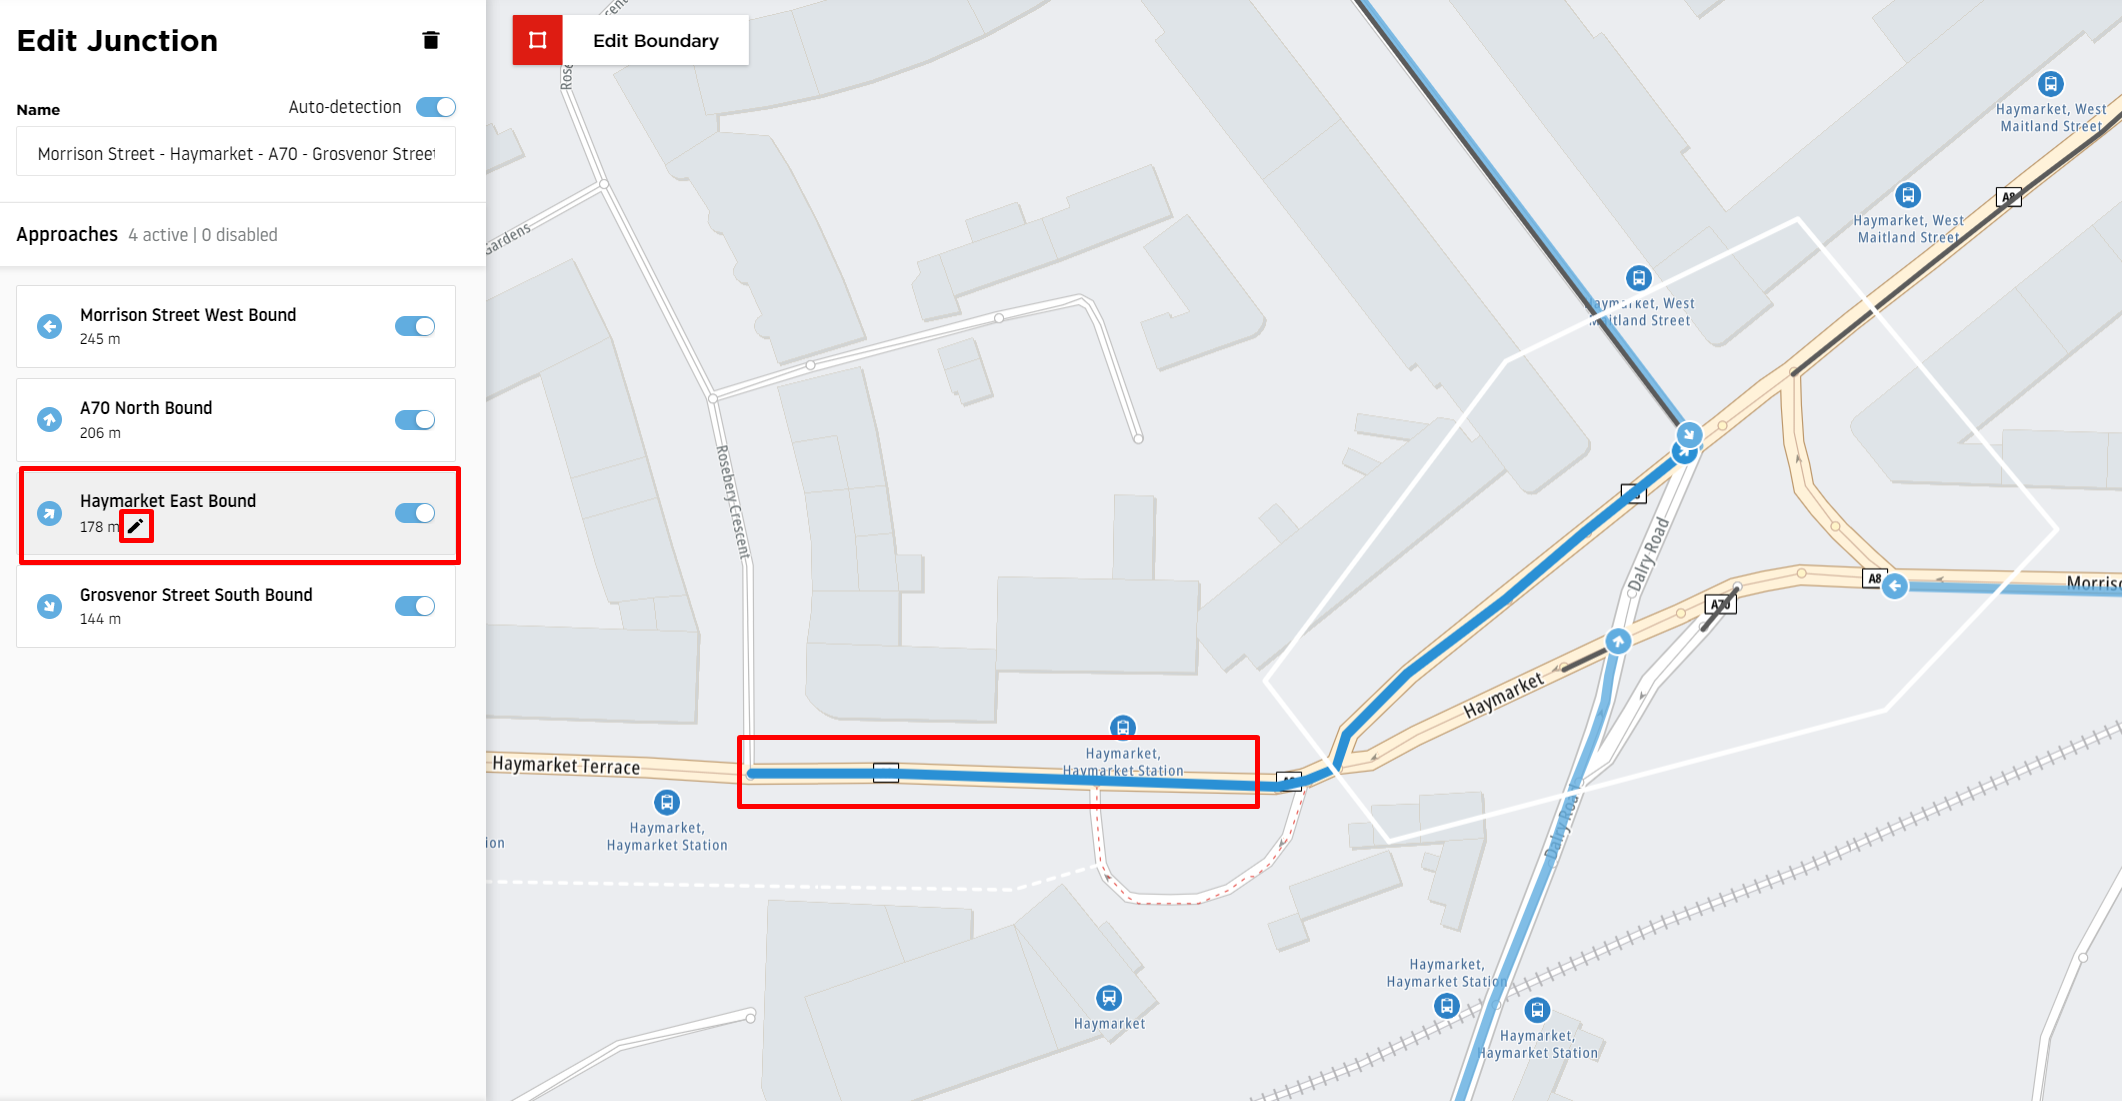
After doing that, you can drag the approach starting pin elsewhere and make it longer or shorter to adjust it based on your use case.