Road Events are divided into five different types:
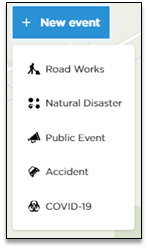
Types highlight what type of events are going to be reported by users. Each type is also divided by specific subcategories which are called causes for event (description of why the event is happening) and effects for location (the impact on the road this location has).

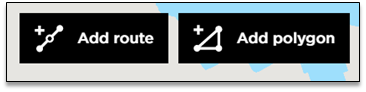
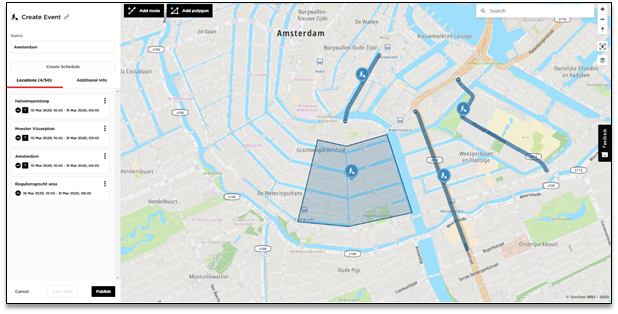
While adding a location to an event, users are able to use two different drawing methods. It is possible to select a specific route by using the Route option, or a whole area by using the Polygon option.
Keep in mind, you cannot use both drawing tools (route and polygon) at the same time while adding a location. You need to save the drawn location first and then you will be able to add another one.
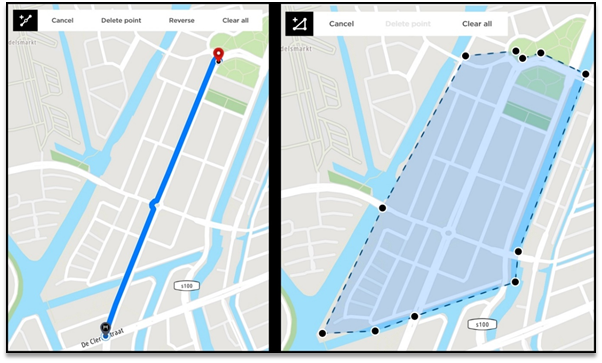
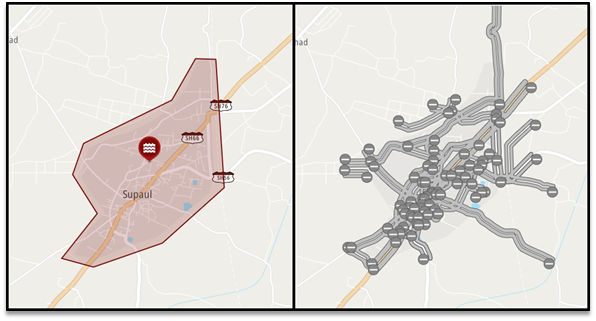
NOTE! While drawing the location the route is being map matched to the closest start/end points of segments. The segments themselves are also visible on the map after zooming in.
The polygon feature allows you to close whole areas instead of creating routes for each street separately. Please be aware that all the roads within the polygon will be affected, so use this tool with caution as you may end up closing more roads than intended.
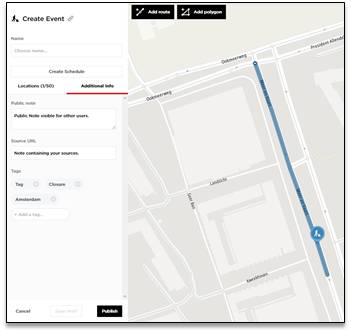
If the location is ready you need to specify its details. By default, the location name is being automatically changed based on the road name, where you are adding the location. You are also able to change the name if required.
After that, you can choose the effect which was previously mentioned in the table above. The effect is the impact this location will have on the traffic.
The last step is to choose the date and the time. You can either select the ‘All day’ option or a specific time range. The time zone is automatically assigned to the location you are adding events to, so there is no need to select time zones.
Once everything is set up, you need to click save to add the location to the event.
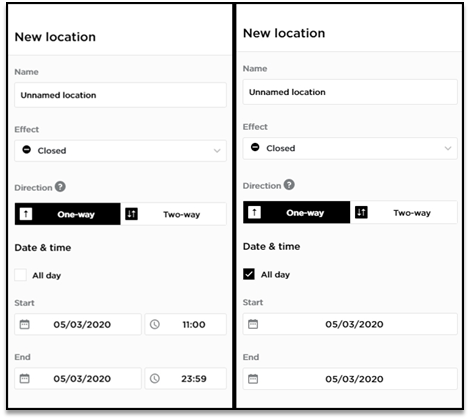
NOTE! Only the ‘Closed’ effect will close the road for traffic, as the other effects serve rather an informative purpose for drivers.
To save your time and to make the application more comfortable in use, it is possible to select multiple routes/areas within one event under the same event type (Road Works, Natural Disaster, Public Event or Accident).
NOTE! In order to make it more convenient while adding multiple locations the date and time inputs are the same by default, but it also could be changed if needed.
The final step is to publish the event. In order to do that it is necessary to add the name. After that click ‘Publish’.
You can also add additional information which is not mandatory to publish an event such as ‘Public Note’ (which is visible for other users), ‘Source URL’ (the note containing your source, visible only for you) and ‘Tags’ (which allow you to mark the event with the specific phrases and make it easier to find them later on).